Discover how to clean silver at home with professional results. A complete guide, full of tried and tested tricks, so your jewelry shines like the day you bought it. Don’t let it get any darker!
Has this ever happened to you? You go to put on that necklace you love and it looks like you pulled it out of a coal mine. It used to happen to me constantly. It frustrated me enormously, because I felt like my jewelry was being ruined and that the only fix was taking it to a jeweler and spending a fortune. So I started researching, testing, failing and trying again, and today I’m bringing you the definitive guide to cleaning silver at home.
You don’t need to be an expert or keep dangerous chemicals in the house. Most of what you need is in your kitchen right now. Seriously. I’m going to show you how to bring your treasures back to life easily, quickly and, above all, safely for the pieces themselves.
Why does silver turn black? It isn’t rusting
Before we get into it, I want to clear something up that surprised me when I learned it. We always say silver oxidizes, but technically that isn’t what happens. What silver does is react with sulfur compounds in the air. That reaction creates a layer of silver sulfide, which is the black or yellowish film we all hate.
A thousand things speed this up. The pH of your skin, for one. Some people have more acidic sweat and their silver darkens within days. Humidity plays a part, along with contact with perfume, lotion, and even the kind of water in your town. So if your favorite necklace has gone black, it isn’t poor quality, it’s simply chemistry.
Knowing this matters, because it helps us understand that we aren’t removing dirt, we’re reversing a chemical reaction. And that’s exactly what these tricks do.
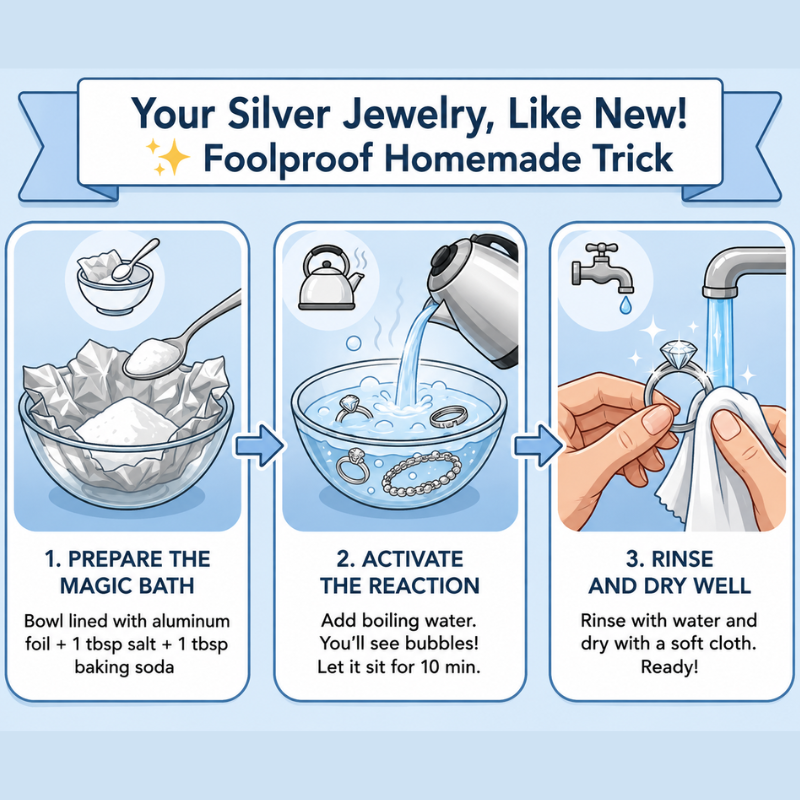
The star method: an aluminum foil and baking soda bath
If you only take one method from this guide, make it this one. It’s my absolute favorite because it looks like magic. It’s fast, it’s cheap and it’s fascinating to watch.
One important warning before you start, because this is the mistake that breaks hearts. If your piece has deliberate blackening in the recesses, the kind of antiqued or oxidized finish you see on marcasite, on Bali style silver, on anything where the design depends on dark detailing, do not use this method. It will strip that darkening right out along with the tarnish and leave you with a flat, characterless piece that can only be fixed by a jeweler. When in doubt, look at whether the black is only in the low points of the design and evenly placed. If it is, it’s meant to be there.
What you need
- A glass or ceramic dish (not metal).
- Aluminum foil.
- Very hot water, almost boiling.
- Baking soda, a heaping tablespoon.
- Table salt, optional and only a pinch.
A note on the salt, since most versions of this trick online call for a lot of it. Baking soda is what actually drives the reaction. Salt speeds up the conductivity a little, but chloride is corrosive to silver, and leaving a piece sitting in hot salt water can pit the surface. I use baking soda as the base and a pinch of salt at most, never a long soak.
Step by step
First, line the inside of the dish with aluminum foil, shiny side up. This is essential, because the aluminum is what pulls the sulfur off your silver. The two metals plus the hot solution create a tiny electrical cell, and the sulfur migrates from the silver to the aluminum, which is why the foil turns dark and your jewelry comes clean.
Place your jewelry on the foil. It’s important that the pieces actually touch the aluminum. Don’t pile them up, give them room so the reaction can work.
Now sprinkle a good tablespoon of baking soda over the pieces. Then pour the hot water in until they’re completely covered. You’ll see bubbles and you’ll probably smell something like rotten eggs. Don’t panic, that’s the sulfur leaving your silver.
Let it work for about ten minutes. You’ll watch the foil darken while your jewelry gets its color back. Then take the pieces out carefully (the water is hot!), rinse them under clean running water and dry them with a soft cloth.
Drying is genuinely the most important step. Leave any moisture behind and the tarnishing starts again sooner than you’d think. Use a lint-free cloth, microfiber is ideal, and give them a little attention.
The baking soda paste trick
If you have a piece that isn’t very black but has lost its shine, or one with a lot of crevices where the previous method doesn’t quite reach, baking soda paste is your best friend.
I love this method because it’s hands-on and you feel the piece coming back bit by bit. Just mix a little baking soda with a few drops of water into a thick paste, about the consistency of toothpaste.
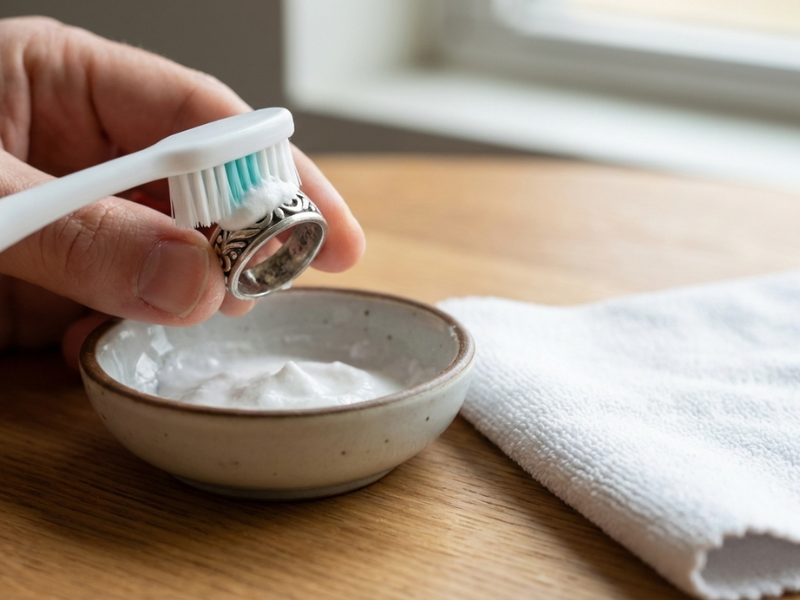
Using a soft-bristled toothbrush (an old one, or buy one just for this), work the paste over the piece. Rub in circles, but gently. We aren’t trying to scratch the silver, only lift that layer of sulfide.
If the piece has engraving or awkward crevices, work the bristles in there. Once you see the paste turning gray, that’s the sign it’s doing its job. Rinse with plenty of warm water and, again, dry thoroughly. This method is ideal for textured rings or complicated link bracelets. Same caveat as before, though: if the dark detail in those crevices is part of the design, leave it alone.
Toothpaste on silver? Yes, but carefully
This is the grandmother’s trick par excellence. You’ve surely heard that toothpaste works on everything. On silver it does work, but there’s fine print you need to know.
Not just any toothpaste will do. Forget the ones with colored gels, exfoliating microbeads or heavy whitening agents. Those can be far too abrasive and damage the finish, especially on highly polished sterling.
Go for a plain white toothpaste, the basic kind. Apply a small amount and rub with a cloth or a soft brush. It’s a great method for when you’re in a hurry and you just need a pair of earrings to look good for dinner. But honestly, for a deep clean I prefer the foil method. Even mild toothpaste is mildly abrasive, so this is an occasional fix rather than a routine, particularly on a mirror finish.
Lemon and vinegar: acids that shine
If you like keeping things natural and prefer not to use anything you couldn’t eat, white vinegar and lemon are good options. Vinegar is an incredible all-purpose cleaner and it holds its own on silver too.
Here’s where I have to correct something I used to do myself, and you may have seen it recommended a hundred times: soaking silver in vinegar with baking soda stirred in. It doesn’t work, and I’ve written about exactly why in another post. Vinegar is an acid and baking soda is an alkali, so the moment you combine them they neutralize each other. All that dramatic fizzing is carbon dioxide escaping, and what you’re left with is salty water that does very little.
Use one or the other. For a vinegar soak, half a cup of plain white vinegar with nothing added, for two or three hours, works nicely on pieces that are fairly tarnished. And the baking soda methods above work beautifully on their own. Just not together in the same bowl.
Lemon is lovely for pieces that have gone yellowish but aren’t fully black. Cut a lemon in half, rub the piece with the cut side and rinse. Plenty of versions of this trick tell you to add salt to the lemon, and I’d skip that part: salt crystals are hard enough to leave fine scratches on polished silver. The citric acid does the work on its own.
What about pieces with stones or pearls?
Here’s where we have to get serious. Everything above works wonderfully on pieces that are only silver. But if your ring has turquoise, opal or, worse, pearls, be very careful.
Porous stones and pearls are extremely delicate. The acid in lemon or vinegar, and even the heat of the water in the foil method, can damage them permanently. Pearls can lose their nacre and stones can change color or crack.
For these pieces, my advice is not to submerge them at all. Use a soft cloth dampened with water and a very mild soap (baby soap is great), and clean only the silver parts, avoiding the stone. If the silver is very dark right next to the stone, use a cotton swab dipped in the baking soda paste so you can be precise.
How to stop silver going black in the first place
Let’s be realistic: silver is going to tarnish eventually, because we live on a planet with air in it. But we can make it much harder. Here are the tricks I’ve refined over the years.
First and most important, burn this into your memory: jewelry is the last thing you put on and the first thing you take off. It sounds trivial and it makes an enormous difference. If you spray perfume, hairspray or lotion while you’re already wearing your earrings, you’re coating them in chemicals that will react with the silver almost instantly. The oils and alcohol in perfume are enemy number one. So finish your whole routine, wait for your skin to absorb everything, and then bring out the silver.
Another trick that’ll save you is storage. Don’t just toss things into an open jewelry box. The air is what carries the sulfur, so the less air they touch the better. I use small individual zip bags. I know it doesn’t look as pretty as having everything displayed on a jewelry tree, but I promise they stay bright for months this way. Add one of those silica gel packets from a shoebox and you’ve won: it absorbs the humidity that makes everything worse.
Two things to keep away from silver while we’re on the subject: rubber bands and wool. Both contain sulfur and both will leave you with a dark band exactly where they touched. The same goes for felt-lined boxes if the felt isn’t specifically tarnish-resistant.
And what about chalk? Yes, really. Put a piece of white schoolroom chalk in your jewelry drawer. Chalk absorbs moisture and sulfur compounds from the air. It’s a grandmother’s trick that works remarkably well and costs almost nothing.
The cardinal sins: don’t even think about it
Sometimes, in our eagerness to make something shine, we go too far and make a mess. Let me confess something. I once tried to clean a bracelet with one of those green kitchen scouring pads. I nearly cried when I saw that yes, the black was gone, but the bracelet was covered in tiny scratches and had lost its mirror finish entirely. Never do this.
The first big mistake is bleach. Chlorine and silver are mortal enemies. Get in a swimming pool wearing silver, or clean the house with bleach while wearing it, and it’ll go black almost instantly, in a particularly stubborn way. So for cleaning or swimming, jewelry comes off.
The second is too much force. Silver is a relatively soft metal. There’s no need to scrub as though you’re restoring a sunken galleon. Gentle circular movements, with cloths that don’t shed fibers. Forget tissues and paper napkins. They feel soft, but they contain wood fibers that will scratch polished silver. Always use microfiber or 100% cotton.
And be careful with generic metal polishes from the supermarket. Some are so aggressive that they take off a layer of silver every time you use them. If your piece is thin sterling, or it’s plated, you can ruin it in seconds.
Gold vermeil and rhodium plated silver
This is a world of its own. A lot of what we buy is sterling silver with a layer of gold over it (vermeil) or rhodium (which makes it brighter and slower to tarnish). If you try to clean these pieces with the baking soda or foil method, you’ll strip the plating and end up with a patchy piece that looks terrible.
For plated silver, forget the experiments. All you can use is warm water with a little mild soap. Soak the piece for a couple of minutes, work over it with a very soft makeup brush if there’s built-up grime, rinse and dry. No hard rubbing, because gold plating is a literally microscopic layer that wears away with friction.
If you see the gold wearing off, it doesn’t mean the piece was bad quality. Plating simply wears down with skin contact and use. In that case, take it to a jeweler for a fresh plating. They come back like new.
Smart storage: what luxury jewelers know
Have you noticed that good jewelry stores always have their pieces looking flawless? Beyond cleaning them often, they’re careful about where they keep them. Velvet and silk aren’t purely aesthetic, they’re materials that don’t scratch and that protect.
If you don’t want to use the plastic bags I mentioned because they feel unglamorous, look for a jewelry box that’s lined inside and closes properly. Avoid storing silver directly on treated or varnished wood, because the chemicals in the finish accelerate tarnishing. Oak is particularly bad for this.
And another tip: don’t mix metals. Don’t store silver in with cheap costume jewelry. Costume pieces often contain metals that corrode quickly and can pass that reaction on to your silver. Everything in its place, as my mother used to say.
The final polish: the master touch
Once the piece is clean and dry, comes the step that separates “that’s fine” from “wow”: polishing.
There are specific silver polishing cloths that come impregnated with a very mild compound. They’re wonderful. When you’ve finished cleaning a piece with soap and water, one pass with that cloth gives you a shine from another planet. The cloth will turn black quickly. Don’t wash it! Washing removes the compound that does the magic. Use it until it’s completely black on both sides, then buy another one.
If you don’t have one of those cloths, a clean dry microfiber does a decent job too. The secret is patience. Give it a little time and attention, and you’ll see the metal start catching the light in a completely different way.
Frequently asked questions
Is the ketchup thing true? I’ve heard it cleans silver beautifully
You’ll laugh, but yes, it works. Ketchup contains acetic acid from the vinegar and citric acid from the tomatoes. Soak a piece of silver in ketchup for about fifteen minutes and the acids go to work on the sulfide.
Do I recommend it? Only if you have nothing else on hand. It’s messy, it smells odd and it’s much harder to rinse off than baking soda and water. But if you’re caught out and need your ring to shine, go ahead. Just make sure you clean every trace out of the crevices, because dried ketchup in an engraving is genuinely miserable to remove.
Can I use an ultrasonic cleaner?
A very professional question. Those little ultrasonic machines are wonderful, because they use sound waves to shake dirt loose. For plain silver, very fine link chains, or filigree pieces a brush can’t reach, they’re excellent.
But here’s the big caveat: be extremely careful if the piece has glued-in stones. The vibrations can dissolve the adhesive and you’ll find the silver spotless and the stone gone. Don’t use one with pearls, emeralds or any stone with natural fractures either, because they can crack. For plain silver, a ten out of ten. For everything else, proceed with care.
What if my piece has diamonds or cubic zirconia?
If they’re genuine diamonds or good quality cubic zirconia, and they’re set rather than glued, you can use almost any of the methods here except the most abrasive ones. Diamond is the hardest material there is, so a little baking soda won’t touch it.
The classic jeweler’s soak for diamonds involves a drop of ammonia, but skip that one for a silver setting: ammonia attacks sterling over time and can leave it dull or pitted. Warm water with a drop of dish soap does almost as much. Brush gently underneath the stone, which is where skin oils and dust collect, and you’ll see the difference.
Does Coca-Cola clean silver?
Back to the soda experiments. Coca-Cola contains phosphoric acid, which is a fairly potent cleaning agent. Leave a silver coin or a ring in a glass of cola overnight and it’ll be noticeably cleaner by morning.
That said, it’s a bit aggressive and it leaves the piece sticky. I’d file it under scientific curiosity rather than routine cleaning method. For what a can costs, you can buy a box of baking soda that lasts a year.
How often should I clean my jewelry?
There’s no fixed rule. It depends how much you wear it and what your skin is like. I have a bracelet I don’t even take off to sleep and it’s always perfect, because the friction against clothes and skin keeps it polished.
The ideal is a quick pass whenever you notice that bright mirror white starting to go slightly yellow. If you wait until pieces are black as soot, getting them perfect again is much more work. A light maintenance clean every two or three months is usually enough for whatever lives in your jewelry box.
How do I know if my piece is real silver or just plated?
The million dollar question. If the piece has no hallmark (that tiny number reading 925 or 800), be suspicious. But bear in mind the stamp is sometimes so small you can’t see it, or the piece is handmade and doesn’t carry one.
A home test is the magnet. Real silver isn’t magnetic. If you hold a strong magnet to your jewelry and it snaps on, I’m sorry to say there isn’t much silver in it, probably iron or steel with a coating. Another test is ice: silver conducts heat better than any other metal, so an ice cube on a silver spoon melts noticeably faster than on ordinary metal. It’s almost as if the spoon were warm.
Why storage matters: your future self will thank you
We’ve talked about cleaning, but let’s go a little deeper into keeping silver clean. Because let’s be honest, what we really want is less work.
There’s a product a lot of people don’t know about that’s a gem for maintenance: anti-tarnish strips. They’re small impregnated papers that absorb the corrosive gases in the air. If you have a large silver collection, buy a pack and put one in each drawer of your jewelry box. They last about six months and they work beautifully.
And please, don’t keep jewelry in the bathroom. I know it’s convenient having it right there while you get ready, but shower humidity is silver’s worst enemy. Steam accelerates the reaction with sulfur and you’ll end up cleaning three times as often. Find somewhere dry, cool and dark. Your bedroom is a far better bet.
Desperate cases: when silver looks beyond saving
Sometimes we rescue something from a flea market, or inherit a piece that’s been forgotten in an attic for thirty years. That silver is so black it looks like stone. For those cases, gentle methods can fall short.
In those situations I work in layers. First the aluminum foil method from the top of this guide, repeated two or three times with fresh water each round. If stubborn marks remain after that, I use a good quality silver polish.
If the piece still won’t come right, it may have what’s called firescale, a dark stain that lies just under the surface of the metal from when the piece was made and soldered. That one isn’t a cleaning problem at all, and it needs a professional with a polishing wheel. But I promise that 95% of the time, with patience and the tricks above, you can bring back even the most hopeless-looking piece.
The finishing touch: show off that shine
There’s nothing I like more than finishing up with my treasures, putting them on and watching them catch the light. It even lifts your mood, doesn’t it? It’s like getting new jewelry every time.
I hope this guide has been useful. My aim is for you to lose any fear of looking after your own things, and to understand that silver isn’t delicate once you know how to treat it. It’s a noble metal, made to last a lifetime and be passed down through generations.
I’ve tried to explain every detail because I love this subject and I want you to feel that same satisfaction of doing things yourself and seeing spectacular results. You know I hold nothing back. Here are all my secrets.
What did you think of this guide? Was there a method you didn’t know about, or one that surprised you? I’m always learning new things, so if you have a trick from your grandmother, or a discovery of your own, please share it in the comments. I’d love to read it and to make this post the shiniest community on the internet.
Do you have a piece that just won’t cooperate? Tell me about it and we’ll see if we can work out a solution together. Don’t be shy, we’re among friends here.
And if you enjoyed it, don’t forget to share this post with that friend who’s always wearing black rings. She’ll thank you forever.