Making an oat solid bar isn’t just mixing powders and oils. It’s closer to fine pastry, where the order of operations really does change the result, and where the quality of your raw materials decides whether you end up with great hair or a bar that crumbles into the trash. Let’s break this craft down from scratch, calmly and in full detail.
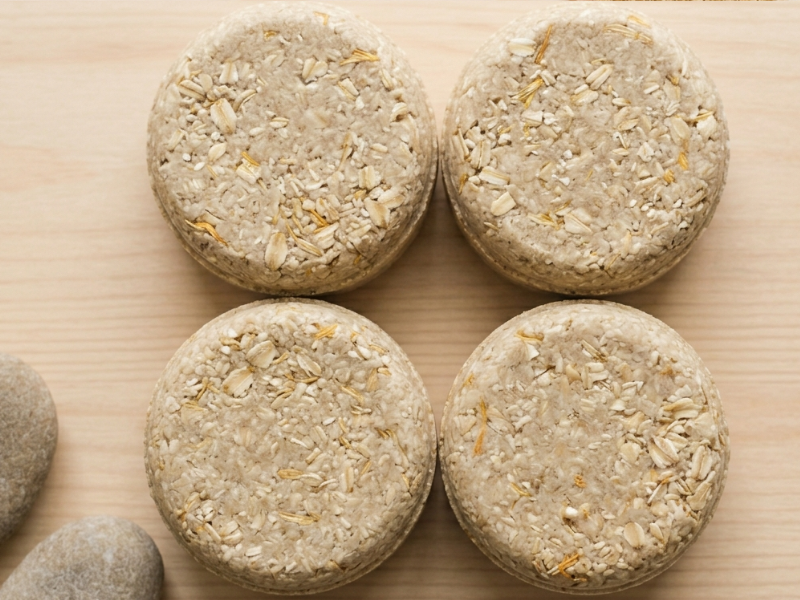
Oat shampoo bar
This post contains affiliate links. If you buy through them you support my work, at no extra cost to you.
The quick summary of oat solid shampoo
| Concept | Technical detail | Notes |
| Difficulty | Low to medium | Requires accuracy with a scale |
| Prep time | 30 minutes | Plus drying time afterward |
| Curing time | 48 to 72 hours | Essential so the bar doesn’t fall apart |
| Main ingredient | SCI surfactant (60%) | Coconut derived, provides cleansing and lather |
| Star active | Colloidal oatmeal (15%) | Soothes the scalp and softens the hair |
| Oil phase | Shea butter / castor oil | Add conditioning, shine and hardness |
| Liquid phase | Oat infusion or water | 10% max, or the bar stays soft |
| Target pH | 4.5 to 5.5 | Hair’s natural range, which helps limit frizz |
| Storage | Draining soap dish | It must air dry between uses |
| Shelf life | 6 to 12 months | Depends on preservative and storage |
1: Why oats, and why now?
Before we get our hands dirty, it’s worth understanding our star ingredient. Oats (Avena sativa) aren’t just a nutritious breakfast cereal. Ancient Rome and Greece already used them to calm irritated skin. But what do they do for hair, exactly?
The chemistry of oats
Oats are rich in beta-glucans, polysaccharides with a real capacity to hold onto water, which on hair translates to a film that helps it feel softer and less parched. They also contain avenanthramides, antioxidant compounds that have been studied for their soothing effect on irritated skin, which is why colloidal oatmeal shows up in so many products for sensitive skin. If your scalp tends to feel tight or itchy after washing, oats are worth a try. One note: if you have a known oat allergy, patch test on your inner arm before using this on your scalp.
2: The home lab, tools and safety
Making your own cosmetics is safe as long as we respect basic hygiene rules.
Hygiene first
- Clean your tools: before you start, everything should be sanitized with 70% rubbing alcohol. Spray your bowls, spatulas and molds, then wipe them down.
- Your space: a clear table in an area without drafts that could send surfactant powder flying.
- Personal protection: this one isn’t negotiable. Powdered SCI (the cleansing agent) is extremely fine and gets airborne easily. If you inhale it, you’ll cough, and it’s irritating to the eyes and airways. Wear a mask (an N95 is ideal), safety glasses and gloves, and keep the dust down by working slowly.
The essential tools
- A precision scale.
- Steel or glass bowls: avoid porous plastic, which can absorb the scent of essential oils if you use them.
- A grinder (optional): if you buy rolled oats, you’ll need to reduce them to a powder as fine as confectioners’ sugar.
3: Anatomy of a shampoo bar, the ingredients in depth
A shampoo bar breaks down into four groups: surfactants, the powder phase, the oil phase, and the liquid phase with actives.
1. The engine: surfactants
Without them, all you’d have is an oat paste that doesn’t clean. The most widely used is SCI (sodium cocoyl isethionate).
- What is it? An anionic surfactant derived from the fatty acids in coconut oil.
- Why use it? It’s biodegradable, sulfate free and leaves a silky feel. Rather than stripping, it emulsifies dirt and oil so the water can carry them away without leaving hair unprotected.
2. The powder phase (oats and more)
This is where our colloidal oatmeal comes in. Unlike ordinary oat flour, colloidal oatmeal is milled so finely that it stays suspended in water and spreads evenly. But we can add more:
- Clays (kaolin): if your hair runs oily, kaolin helps absorb excess sebum without being as drying as green clay.
- Plant powders (amla or shikakai): for extra strengthening feel, these ayurvedic staples are lovely, though they darken the mix a bit.
3. The oil phase (butters and oils)
Fats do two jobs here: conditioning the hair and giving the bar structure.
- Shea butter: solid at room temperature, which helps keep the bar from falling apart. It also contains vitamins A and E along with fatty acids that condition the hair.
- Coconut oil: conditioning and popular, but use it sparingly. Like any oil, too much will cut your lather, and some people find it leaves hair feeling drier rather than softer.
- Sweet almond or castor oil: castor is the classic choice when you’re after shine and a bit of slip.
4. The liquid phase and additives
Here we use distilled water, hydrosols (rose or lavender water) or infusions. This is also where the actives go:
- Panthenol (provitamin B5): a favorite for shine and softness.
- Essential oils: not only for scent. Rosemary has some early research behind it for scalp circulation and hair growth, though the evidence is still preliminary, and tea tree is often used for flaky scalps. Keep them at low percentages, keep them out of your eyes, and skip them entirely for young children or during pregnancy unless you’ve checked first.
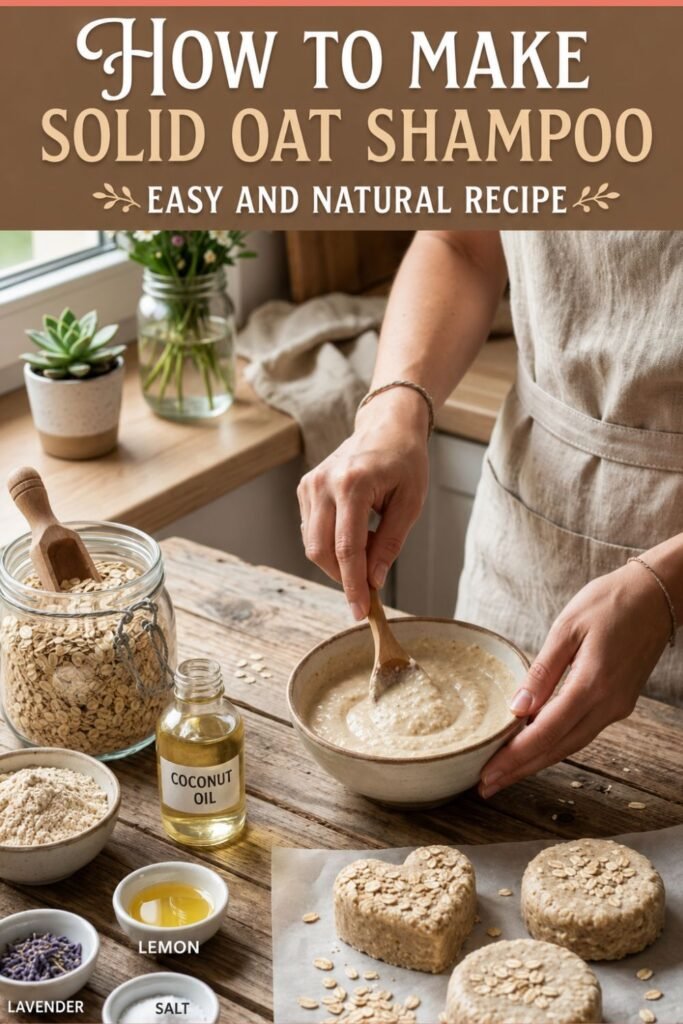
Illustrative image created with AI assistance
4: Advanced formulating, the master recipe
Let’s build a balanced recipe for about 100 grams of oat shampoo bar. These proportions work best for normal to dry hair, which is where oats really shine.
| Ingredient | Amount (g) | Function |
|---|---|---|
| SCI (surfactant) | 60 g | Cleansing and lather |
| Colloidal oatmeal | 15 g | Softening and soothing |
| Shea butter | 8 g | Conditioning and hardness |
| Castor oil | 5 g | Shine and slip |
| Water or oat infusion | 10 g | Binder |
| Essential oil (lavender) | 1 g | Scent |
| Broad spectrum preservative | 1 g | Prevents microbial growth |
Why use a preservative if the bar is solid?
Plenty of people will tell you shampoo bars don’t need a preservative because there’s no water in them. Not so fast. The moment it goes in the shower, it gets wet. If the bar stays damp, microorganisms can grow on the surface. A gentle broad spectrum preservative keeps your creation safe down to the last sliver. Use it at the percentage stated on its label, and remember that most (including Cosgard) only work below about pH 6.
5: Making oil solid bar, step by step
This is where most people go wrong. It isn’t enough to mix everything together, you have to follow a specific order.
Phase 1: Prepping the SCI
If your SCI comes in noodles, break them down a little in a mortar (wearing your mask). If it’s already powdered, you’re set. Put it in the steel bowl.
Phase 2: Melting the fats
Melt the shea butter and castor oil in a double boiler. Don’t let them boil, you only want them liquid. Once melted, take them off the heat.
Phase 3: Bringing powders and liquids together
Add the colloidal oatmeal to the SCI and mix well. Then pour in the liquid phase (water or infusion). You’ll notice the SCI starting to clump. That’s normal.
Phase 4: The final mix
Pour the melted fats over the powders. Now use your hands (with gloves) or a sturdy spatula and work the mixture hard. The goal is for every particle of powder to be coated in oil and water. The final texture should be like wet sand for building castles: squeeze it in your fist and it should hold its shape without crumbling.
Phase 5: Adding the actives
Once the mass is warm rather than hot, add the essential oil and the preservative. If you add them while it’s still very hot, the essential oils will evaporate and some preservatives lose effectiveness.
Phase 6: Molding
This step is critical for how long the bar lasts. Don’t just drop the mass into the mold and call it done. You have to press. Use the bottom of a glass, or a press if you have one. The more compact the bar, the less water soaks into it during use and the longer it lasts.
6: pH, the forgotten detail
Did you know hair is slightly acidic? Somewhere between 4.5 and 5.5. Many artisan soaps (the traditional kind made with lye) have a pH of 9 or 10. That lifts the hair’s cuticle and leaves it rough and dull.
With our SCI and oat recipe, the pH should land naturally around 5 to 6. Even so, I’d recommend buying pH test strips. Take a small piece of your mixture, dissolve it in a little water and measure.
- If it’s too high: add a drop of lactic acid or a pinch of citric acid, then measure again.
- If it’s too low (rare): it can be corrected, but this formula usually lands right where you want it.
7: Caring for your oat shampoo bar so it doesn’t turn to mush
You’ve invested time and money, so don’t let your bar dissolve into a shapeless paste in three days.
- The golden rule: shampoo bars hate standing water. If you use a flat ceramic soap dish, you’re dooming your bar. You need a dish with proper drainage. Bamboo or stainless steel with a rack work best (mine is wooden).
- Out of the shower: if your bathroom is small and gets steamy, take the bar out after you use it and let it dry somewhere drier.
- Travel: if you’re traveling, make sure it’s fully dry before it goes into its aluminum tin. Store it damp and it’ll stick to the tin and be a pain to get out.
Frequently asked questions about oat solid shampoo
Can I use this recipe if I follow the Curly Girl method?
Generally yes. This recipe has no silicones and no harsh sulfates, so it fits the usual criteria. Oats can help hair feel smoother and look less frizzy. As always with CG, check each ingredient against your own version of the method, since interpretations vary.
My bar is crumbling, what did I do wrong?
You’re probably short on liquid phase, or you didn’t press hard enough in the mold. It could also be too much powder and not enough butter. Don’t throw it out! Grate it, add a teaspoon of water, warm it gently in a double boiler and re-mold it, pressing much harder this time.
How long does a 100 g bar last?
For medium length hair washed three times a week, usually two to three months. That’s a real saving compared to bottles.
Why doesn’t it lather as much as store bought shampoo?
Lather isn’t the same thing as cleaning. Commercial shampoos use powerful foaming agents. Ours makes a creamier, mousse-like lather that’s gentler. If you want more foam you can raise the SCI to 65%, though the oats do a good job of keeping things soft as they are.
Here’s something personal. When I made my first oat bar, I went overboard on coconut oil because I thought more oil meant more moisture. Total mistake. My hair came out limp, like I hadn’t washed it in a month.
That’s how I learned that in natural formulating, less is more. Oats already bring the softness we’re after, there’s no need to weigh the hair down with extra oil. What we want is balance.
Customize your oat shampoo bar for your hair
Even though we’re focused on oats today, you can play with the base recipe:
- Oily hair: swap 5 g of oats for 5 g of green clay and use jojoba oil instead of castor. Lemon or grapefruit essential oil pairs nicely, though both are photosensitizing, so keep them low and rinse thoroughly.
- Very dry hair: raise the shea butter to 10 g and add a little powdered honey or plant inulin.
- Flaky or itchy scalp: try neem powder or cedarwood essential oil. Oats will do their soothing part, and these may add to it. If the flaking is persistent, painful or spreading, that’s worth seeing a dermatologist about rather than reformulating again.
The impact of your choice
Making your own oat shampoo bar isn’t just a craft project. You’re cutting down on the plastic packaging that piles up in our waste stream, choosing ingredients you’ve picked yourself, and stepping off the treadmill of buying bottle after bottle. If you’d like to read more about the debate around some ingredients used in conventional cosmetics, there’s plenty written on endocrine disruptors, a topic where research is ongoing and the picture is still being worked out.
Every time you shower and catch the natural scent of oats and oils, you’ll know you made this yourself. That feeling of capability is addictive.

Learn how to make your own oat shampoo bar to soothe the scalp and care for your hair, by hand and without plastic packaging.
Total Time: 72 hours and 1 minute
Prepare the dry ingredients
Weigh the SCI and the colloidal oatmeal into the bowl. Mix gently to combine, wearing a mask while you handle the powder.
Melt and add the fats
Melt the shea butter in a double boiler and add it to the bowl of powders along with the oat infusion.
Knead the mixture
Work the mass with a spatula or your hands (wearing gloves) until you get a texture like wet sand that holds together when you squeeze it.
Press into the mold
Fill the silicone mold with the mixture and press down hard. This step is what keeps the bar from crumbling later.
Dry and cure
Leave the mixture in the mold for 24 hours. Then unmold it and let the bar harden in the open air somewhere dry for another 48 to 72 hours.
Tools:
- Precision scale.
- Glass or stainless steel bowl.
- Silicone mold.
- Mask, gloves and pH strips.
Materials: SCI surfactant: the gentle cleansing base. Colloidal oatmeal: the active that soothes and softens. Shea butter: for hardness and conditioning. Distilled water or oat infusion: to bind the mixture. Broad spectrum preservative.
I hope this giant guide becomes your go-to manual. I’ve put everything here that I wish I’d known when I started, without holding anything back. Natural formulating is a constant learning process and every head of hair is different, so don’t be afraid to experiment.
The first time you see your own bar produce that soft white lather, and see how your hair looks when it dries, I promise you’ll feel pretty proud of yourself.
Leave me a comment below! I answer all your questions and I love seeing you dive into making your own natural creations. A big hug, and enjoy that oat-washed hair!
If you like the recipe, you’ll like our solid hair care book with 10 shampoo recipes, 10 conditioner recipes, and 10 hair mask recipes — you’re sure to find the perfect recipe for you!