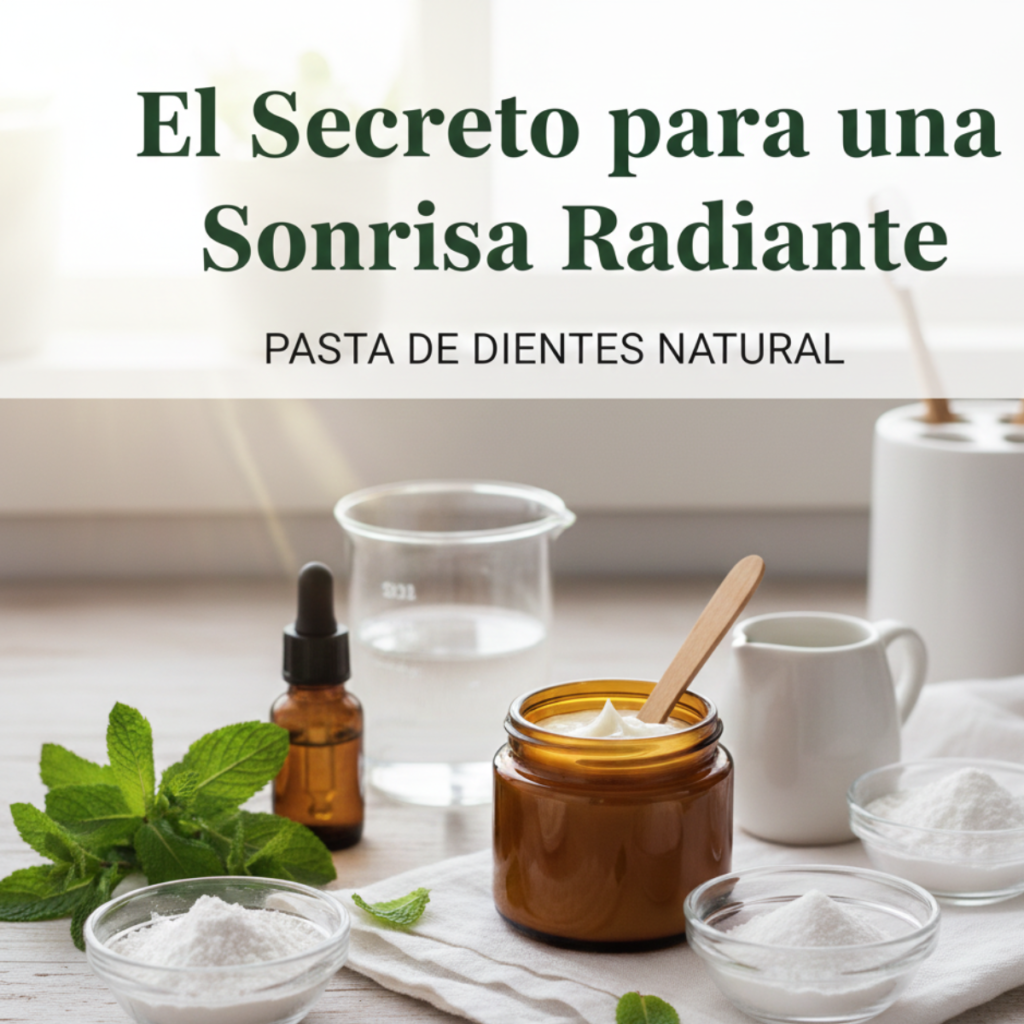
Learn how to make a natural toothpaste with baking soda, kaolin clay and xylitol. A thorough guide to a gentle, homemade addition to your oral care routine.
I’ve always believed that the smallest decisions end up having the deepest effect on our wellbeing. Swapping your store-bought toothpaste for one you made yourself might look like a minor detail, but I promise you it’s a small act of independence and self-care that’s genuinely satisfying.
Why I made the switch to natural toothpaste
It started one morning while I was brushing my teeth, only half awake. I found myself staring at the tube and seeing so many warnings and unfamiliar names that something in me sat up and paid attention. I started wondering what half of it actually was, and whether I wanted all of it in my mouth twice a day.
So I started experimenting. My first batch was a disaster, I’ll admit it. Too abrasive, and the taste… well, let’s say there was room for improvement. But I’m not someone who gives up when something has caught my interest, so I kept adjusting the proportions until I landed on the formula I’m sharing with you today.
Making your own toothpaste isn’t only about saving money or cutting down on waste, though it does both. It’s about knowing exactly what you’re using, choosing something gentle, and having a small daily ritual that feels like yours.
One thing I want to say clearly right at the start, because I’d rather be honest with you than sell you something: this recipe is not a replacement for professional dental care, and it doesn’t contain fluoride. I’ll come back to that further down, because it deserves a proper conversation rather than a throwaway line.
Meet the ingredients
For a toothpaste to work, it needs to do a few things: clean, polish gently, freshen and taste good enough that you actually want to use it. You don’t need a list of twenty ingredients for that. Six well-chosen ones will do.
Baking soda: cleaning and pH balance
Baking soda is probably one of the most underused and most misunderstood ingredients in the natural pantry. It gets called far too abrasive for teeth, but the evidence actually says otherwise when it’s used sensibly.
Chemically it’s a salt made of sodium and bicarbonate ions, and its usefulness in toothpaste comes down to two things.
First, it’s an excellent pH buffer. Your mouth turns acidic after eating, and that acidic environment is what lets cavity-causing bacteria thrive and demineralize enamel. Baking soda is alkaline, so it neutralizes those acids quickly.
Second, it cleans mechanically but very gently. Its particles are hard enough to lift plaque and surface stains, and soft enough not to scratch enamel when the mixture is balanced. It’s also a natural deodorizer, so it tackles bad breath at the source rather than covering it with fragrance.
Kaolin clay: the gentle polisher
If baking soda is the cleaner, kaolin clay is the luxury polisher. It’s been used for thousands of years across many cultures, extracted from kaolinite-rich rock and ground into an almost impalpably fine powder.
What I like about kaolin clay here is how mild it is. It has a pH close to that of our skin and mucous membranes, which makes it a good fit for sensitive gums. And it gives the paste a creamy texture that makes brushing far more pleasant, without the gritty feel some badly formulated natural pastes have.
You’ll see kaolin described online as “remineralizing,” and I used to repeat that myself. Being straight with you: kaolin is an aluminum silicate, and there’s no good evidence it delivers usable minerals into enamel. What it does do well is polish very gently and give the paste its body — which is plenty of reason to include it. If remineralizing is what you’re specifically after in a fluoride-free paste, the ingredient with actual research behind it is nano-hydroxyapatite, which you can buy as a powder and add to this recipe.
Xylitol: the sugar that fights cavities
This is the ingredient most people have never heard of, and it’s the one that makes the difference between a mediocre homemade paste and a good one. Xylitol is a polyol, a sugar alcohol usually derived from birch bark or corn fiber.
Sugar in toothpaste? Yes, but with a rather brilliant biological trick behind it. The bacteria behind cavities, like Streptococcus mutans, love sugar. They take up xylitol thinking it’s glucose, but they can’t metabolize it. The result is that they produce less acid and don’t multiply the way they otherwise would.
Xylitol also stimulates saliva production, and saliva is our most powerful natural defense, carrying the minerals and enzymes that repair enamel and keep the mouth clean. On top of that it tastes pleasantly sweet, which balances out the salty note of the baking soda.
One important warning that belongs right here: xylitol is extremely toxic to dogs. Even small amounts can cause a dangerous drop in blood sugar and liver failure. If there’s a dog in your house, keep both the xylitol and the finished toothpaste well out of reach, and don’t leave the jar sitting on a low shelf.
The liquid side: glycerin, water and peppermint
To turn those powders into a workable paste that doesn’t dry out by day two, you need a few specific liquids. Not just anything will do, and this is where quality decides whether you love using your paste or it ends up forgotten at the back of a cabinet.
Vegetable glycerin: the secret to the texture
Vegetable glycerin, or glycerol, is a colorless, odorless, faintly sweet liquid derived from vegetable oils like coconut or palm (I’d always look for a sustainably sourced one). Its job here is essential: it’s a humectant.
Meaning it holds onto moisture. Without it, your clay and baking soda mixture would set into a hard block within hours. It also gives the brush that smooth glide that makes the whole thing feel good.
There’s a small debate in natural circles about whether glycerin “coats” teeth and blocks remineralization. Having looked into it, that claim doesn’t have much behind it, and at the proportions we’re using it rinses away perfectly well with water.
Distilled or boiled water
It looks like the simplest ingredient, but it matters. Don’t use water straight from the faucet if you want your paste to keep, since tap water can carry chlorine, minerals or microorganisms that will affect the formula.
The water dissolves the xylitol and hydrates the clay into that gel structure we’re after. I always recommend distilled water, or failing that, bottled water you’ve boiled and let cool. A small step, but it’s what keeps your creation safe and stable.
Peppermint essential oil
If there’s one thing we all want from toothpaste, it’s that deep-clean feeling and fresh breath only mint delivers. But using pure peppermint essential oil goes well beyond a nice smell.
It’s a natural antiseptic that helps with the bacteria behind bad breath, and it has mildly numbing properties that come in handy if you have a bit of sensitivity. It also wakes you up, which is no small thing first thing in the morning. It’s the finishing touch on the whole formula.
Essential oils are meant to be spat out, not swallowed, so stick to the drop count in the recipe and don’t be tempted to double it.
The recipe
Now, after all that theory, let’s get our hands dirty (well, slightly). This recipe is the result of a lot of trial and error. It’s balanced to clean without being harsh, and to taste good enough that brushing stops being a chore.
Ingredients
Write these proportions down. This makes a small jar that lasts me about a month, which is exactly what you want so the paste is always fresh:
- 2 tablespoons kaolin clay, cosmetic grade and finely milled.
- 1 teaspoon baking soda (fine, so it doesn’t scratch).
- 1 teaspoon xylitol (grind it if the crystals are coarse).
- 2 tablespoons liquid vegetable glycerin.
- 2 to 3 teaspoons distilled water, adjusting as you go.
- 10 to 15 drops peppermint essential oil, depending on how much bite you like.
Step by step.
Making this is a lovely little ritual. I’d take your time with it and enjoy the smells and textures as they come together.
First, find a ceramic or glass bowl. Traditional practice is to avoid metal when working with clays, so use a wooden or silicone spatula, or even a porcelain spoon.
Start by mixing the dry ingredients: the kaolin, the baking soda and the xylitol. Stir until you have an even powder.
Next, add the vegetable glycerin. Start mixing and you’ll see it turn into a kind of damp sand. Don’t worry if it doesn’t want to come together — that’s what the water is for.
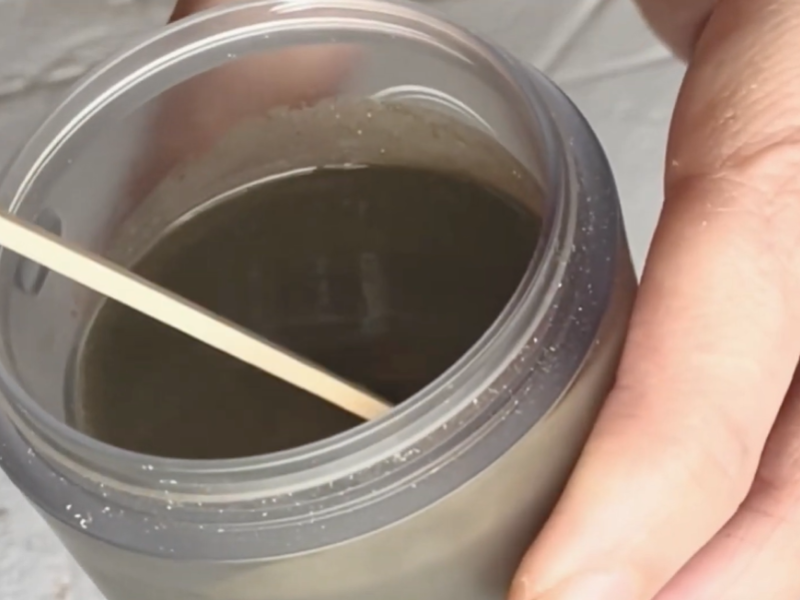
Add the water a teaspoon at a time, stirring energetically. You’ll watch the clay hydrate and a smooth, glossy cream appear. If you want it looser, add a little more water; if you want it thicker, stop sooner. The perfect texture is one that stays on the brush without dripping but spreads easily.
Finally, add the drops of peppermint essential oil. Mix one last time so the scent runs all the way through. The smell at that moment is incredible, I promise you.
How to use it
The product changes, and so does the way you use it. With no artificial foaming agents, you won’t get a mouth full of bubbles. That’s fine. Foam isn’t what cleans; the ingredients and the movement of the brush are.
You only need a small amount, about the size of a pea. Wet your brush a little, add the paste and brush as usual, with gentle circular movements. Use a soft-bristled brush and don’t press hard — with any paste, brushing pressure does more damage to enamel and gums than the paste itself.
The slightly salty taste of baking soda mixed with sweet xylitol and sharp mint may feel strange at first, but give it three days and your tongue will adjust. You’ll start noticing real flavors again.
You can watch the process on YouTube, and subscribe to the channel if you like — it’s free!
Keeping your toothpaste fresh and safe
One question that always comes up with homemade products is how long it’ll keep. With no industrial preservatives, we’re the ones responsible for looking after it. Don’t worry, it’s easier than it sounds — but it does need doing properly, because this recipe contains water, and anything with water in it can grow bacteria and mold.
The right container: glass and darkness
First, the jar. Skip plastic and use a small glass one. Amber or violet glass is even better, since it protects the mixture from light, which degrades the peppermint oil.
I use jars of about 50 or 60 ml. Why so small? Because with something natural I’d rather make a little and have it always fresh. It also means I can tweak the recipe each month if I feel like trying something different.
The golden rule: don’t contaminate it
This is where we tend to slip up. We’re used to squeezing a tube, but here we have an open jar. Never, and I mean never, dip your toothbrush directly into it. A brush carries bacteria and moisture, and dipping it in contaminates the whole batch.
Use a small wooden or silicone spatula, or a clean coffee spoon, to scoop out what you need onto the brush. It takes a second and it keeps your paste clean all month.
Make small batches and use them within about four weeks. If you ever notice a change in smell, color or texture, or anything that looks like a spot of mold, throw it out and make a fresh jar. That’s not being dramatic, it’s just what a water-based product with no preservative requires.
Where to keep it
Keep the jar somewhere cool and dry. Bathrooms tend to be humid with big temperature swings from the shower, so make sure the lid is always properly closed. If your summers are brutal, you could even keep it in the refrigerator, which gives you an extra hit of cool when you brush.
Why this formula is kind to your enamel
I want you to understand why these ingredients work well together, and equally what they can and can’t do.
How remineralization actually works
Our teeth aren’t inert rocks; they’re constantly losing and regaining minerals. When we eat acidic or sugary things, enamel loses minerals — demineralization. Saliva then carries minerals back in, and that’s the repair process at work.
What this paste does is support that process indirectly. The baking soda neutralizes acid so demineralization stops sooner, and the xylitol boosts saliva flow, which is the vehicle that carries minerals back to the enamel. What it doesn’t do is deliver minerals itself. If you want an ingredient that genuinely does that without fluoride, add half a teaspoon of nano-hydroxyapatite powder to the recipe — it’s the synthetic version of what enamel is actually made of, and it has real clinical research behind it.
Abrasiveness: clearing up the baking soda myth
A lot of people are wary of baking soda because they think it’ll wear their enamel down. There’s a scale for this called RDA (Relative Dentin Abrasivity). What’s interesting is that pure baking soda scores very low on it, around 7, compared with many commercial whitening pastes that use far harsher silicas and score in the hundreds.
In this recipe, mixing the baking soda with very fine kaolin and glycerin as a lubricant gives you a paste that polishes extremely gently. That’s why teeth look brighter: not because we’ve used a bleaching chemical, but because we’ve lifted surface stains and let your natural tooth color show through.
What’s not in it, and the fluoride conversation
To understand what we’ve made, it helps to look at what we’ve left out , and to be honest about the trade-offs, because there are some.
About fluoride
I’m going to be straight with you here rather than tell you what a natural living blog is supposed to say. Fluoride is the single best-evidenced cavity-preventing ingredient in dentistry. Decades of research support it, and every major dental association recommends it. The concerns you read about, like fluorosis, come from swallowing too much fluoride during the years when children’s adult teeth are forming, not from an adult spitting out toothpaste.
So why do I use a fluoride-free paste? Because my own risk of cavities is low, I’ve discussed it with my dentist, and I prefer a simple formula I’ve made myself. That’s a personal choice, not a claim that it’s better.
What I’d genuinely recommend: if you get cavities easily, if you have dry mouth, gum recession, existing fillings or crowns, if you’re in braces, or if this is for a child, talk to your dentist before dropping fluoride. There’s no shame in using a fluoride paste at night and this one in the morning, which is what a lot of people end up doing. Xylitol is a real help against cavity bacteria, but it isn’t a like-for-like swap for fluoride, and I’d rather you heard that from me.
No SLS or foaming agents
Know why commercial toothpaste foams so much? Sodium lauryl sulfate. It’s a perfectly common surfactant, but it’s also a known irritant that triggers canker sores in people who are prone to them and can temporarily dull your sense of taste — which is why so many dentists suggest an SLS-free paste to patients with recurring mouth ulcers. Ours doesn’t foam, and it doesn’t need to.
No microplastics or dyes.
Plenty of pastes have contained tiny plastic beads that end up in the ocean and in the food chain. Ours is biodegradable from the first ingredient to the last.
Adapting the recipe to your needs
One of the things I love about being my own formulator is being able to adjust depending on how my gums and teeth feel at different times of year.
For delicate gums
If your gums are feeling more sensitive than usual, halve the baking soda and add a teaspoon of licorice root or sage powder. Both are traditionally used for their soothing, anti-inflammatory qualities.
You can also swap five drops of the peppermint for tea tree oil, which is a strong antiseptic and is often used for gum health. Do keep tea tree to those few drops and always spit thoroughly, since it shouldn’t be swallowed. The taste is more medicinal, but a lot of people like it.
And a word from the heart: gums that bleed regularly aren’t something to manage with toothpaste. That’s a sign of gum disease and it needs a dentist, because early gum disease is reversible and late gum disease isn’t.
Extra whitening for special occasions
Baking soda and kaolin already polish nicely, but sometimes you want a little more. In that case you can add a pinch of activated coconut charcoal. Just a pinch, because charcoal stains everything (though it rinses off fine).
Charcoal is porous and binds the tannin particles left behind by coffee, tea and wine. Two honest caveats, though: the evidence for charcoal whitening is thin, and it’s more abrasive than the rest of this recipe. Use it occasionally, not daily, skip it entirely if you have fillings, crowns or veneers along your front teeth, and don’t use it at all if you have receding gums, since it can settle along the margins.
The transition: what to expect
I want to be completely honest with you, because the switch can be jarring at first. We come from years of products designed to please our senses with artificial foam and extremely strong synthetic mint.
The foam factor
The first thing you’ll notice is that there’s no foam. That can make it feel like nothing’s happening, but it’s the opposite. Without the distraction of bubbles, the brush is in direct contact with your teeth. You’ll find you brush a little more attentively. Run your tongue over your teeth afterward and they’ll feel smoother than usual.
The taste
Your palate goes through a small detox too. Commercial pastes tend to be very sweet and very sharp. Ours has a more complex taste: the natural sweetness of xylitol, the mineral base of the clay, the salty note of baking soda, all wrapped in real mint. Within a week you’ll be used to it, and I’d bet that if you go back to a commercial paste it’ll taste startlingly artificial.
Frequently asked questions
Can children use this toothpaste?
This is the big one, and I’d rather give you a careful answer than an easy one. The base ingredients are safe, and xylitol is genuinely useful against cavity bacteria. But children are exactly the group for whom fluoride has the strongest evidence, and they’re also the group most likely to swallow toothpaste rather than spit it out. So my honest advice is to talk to your pediatric dentist before switching a child to a fluoride-free paste, especially if they’ve had cavities before.
If you do make it for a child, leave out the baking soda or use a minimal amount, and skip the peppermint essential oil for children under six — a drop of sweet orange is gentler and safer. And remember that natural doesn’t mean edible: it’s still meant to be spat out.
I have braces. Can I use homemade toothpaste?
You can, and the clay and baking soda do a nice job of cleaning around brackets, where plaque builds up fastest. Just rinse very thoroughly with warm water so no clay is left between the wires.
That said, braces are a special case. The white spots that appear around brackets are one of the most common problems in orthodontics, and fluoride is the main thing that prevents them. Most orthodontists will specifically ask you to use a fluoride paste while you’re in treatment, so please check with yours before switching.
What if my teeth are very sensitive to hot and cold?
For sensitivity, increase the glycerin and kaolin and cut the baking soda right back, and always use a soft brush with light pressure. You can add a drop of clove essential oil, which has been used for centuries to soothe dental discomfort, though only occasionally, since clove can irritate the mucosa with sustained use.
One thing to know: sensitivity that’s new, worsening or focused on one particular tooth is worth getting looked at rather than managing at home. It can be a sign of a crack, a cavity or receding gums, and none of those get better with toothpaste.
An impact beyond your mouth
We sometimes forget that everything we spit down the drain ends up in our rivers and seas. Conventional toothpaste has historically included microplastics and various additives that don’t do aquatic ecosystems any favors.
Choosing a homemade paste means you stop generating plastic tubes that take centuries to break down. Every time you brush with your clay and xylitol mixture, you’re making a small revolutionary gesture. For me, knowing my hygiene routine doesn’t harm anything is as satisfying as the state of my own teeth.
The complete routine: beyond brushing
Making your own toothpaste is the biggest step, but I like to think of oral hygiene as a whole ritual. Here are my final suggestions to go with your new creation. And one that outranks everything on this page: floss, and see a dentist for a checkup. Nothing in a jar substitutes for either.
Tongue scraping
If you don’t use a tongue scraper yet (copper or stainless steel are best), start tomorrow. Overnight, our tongue accumulates the bacterial coating that’s largely responsible for morning breath. Before using your paste, scrape gently from back to front. Your sense of taste sharpens noticeably.
Oil pulling
This is an old practice that pairs nicely with a natural paste. A couple of times a week, before brushing, swish a tablespoon of virgin coconut oil around your mouth for 10 to 15 minutes. Then spit the oil into the trash rather than the sink, since it will solidify and clog your drain, and brush as usual.
Being fair about it: the research on oil pulling is limited and it’s no substitute for brushing and flossing. But plenty of people, myself included, find it leaves the mouth feeling clean and it’s a pleasant few minutes.
The short version
We’ve covered a lot, so here’s a quick summary to keep to hand before your first batch:
- Base ingredients: kaolin clay, fine baking soda, xylitol, vegetable glycerin, distilled water and peppermint essential oil.
- Mixing: always in glass or ceramic, with a wooden or silicone spatula.
- Texture: add the water a little at a time until you have a cream that won’t drip off the brush.
- Use: a pea-sized amount on a soft brush. Don’t expect foam.
- Storage: a well-sealed glass jar somewhere cool and dark, always scooped with a clean spatula, and replaced every four weeks.
- Keep it away from dogs — xylitol is toxic to them.
Learn step by step how to make a homemade toothpaste with natural ingredients like kaolin clay, xylitol and peppermint. A simple, gentle formula to make at home.
Total Time: 10 minutes
Mix the dry ingredients
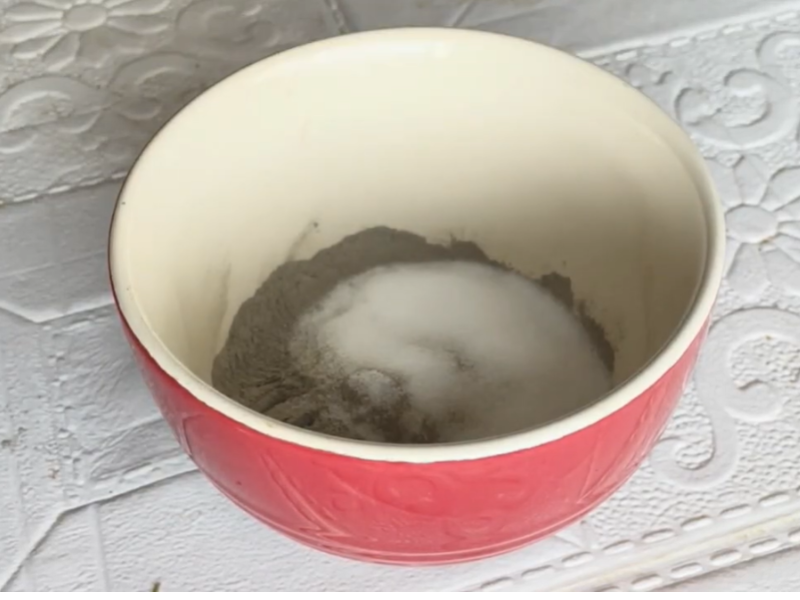
In a glass bowl, combine the kaolin clay, baking soda and xylitol. Stir with a wooden spatula until the powder is completely even.
Add the vegetable glycerin
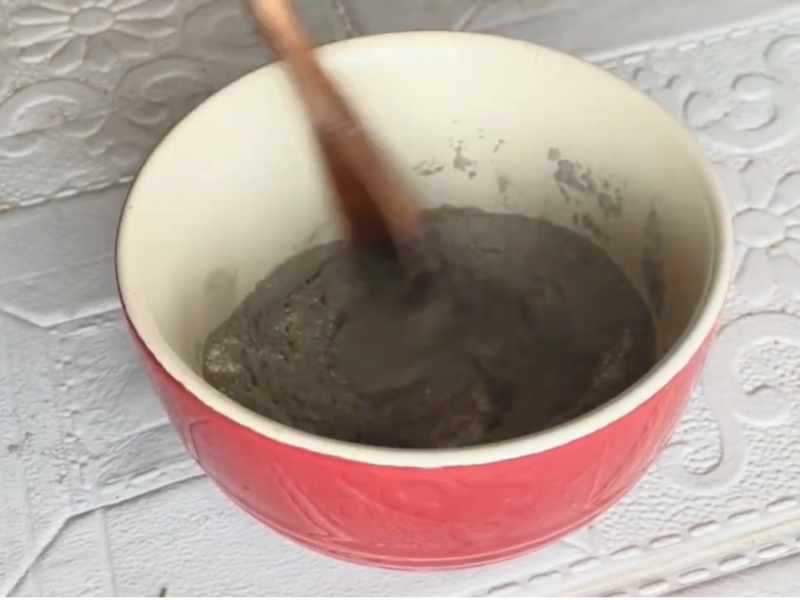
Pour the two tablespoons of glycerin over the dry mixture. Stir until you have the texture of damp sand.
Hydrate with distilled water
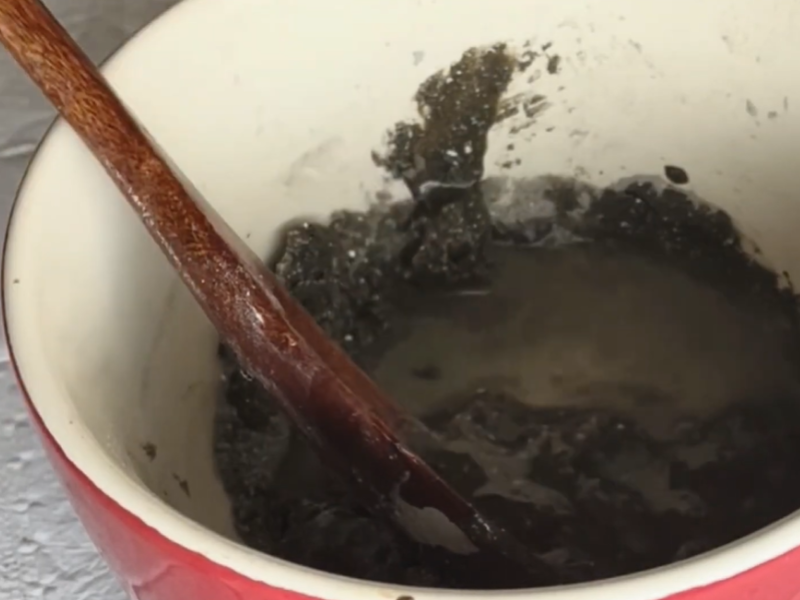
Add the distilled water a teaspoon at a time while stirring energetically. Stop when you have a creamy, glossy texture.
Add the peppermint
Stir in 10 to 15 drops of peppermint essential oil. Mix one last time so it’s distributed all the way through.
Jar it and store it
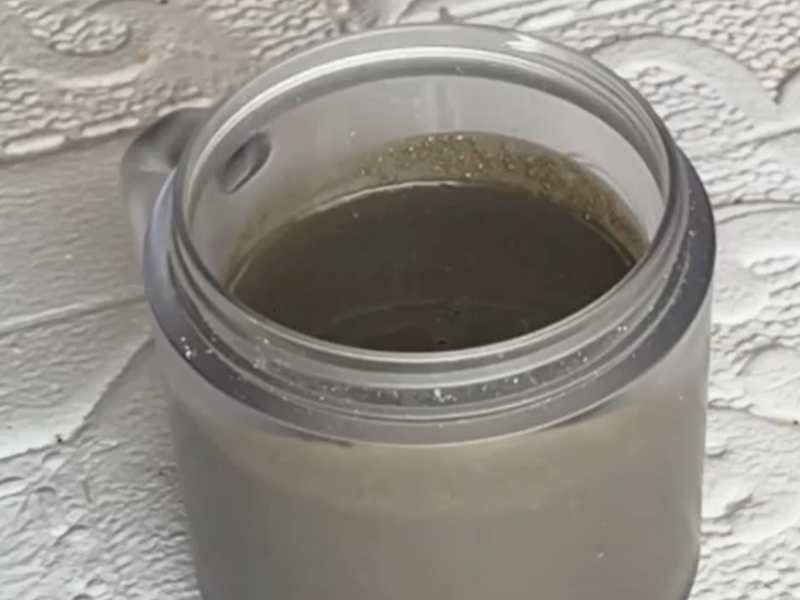
Transfer the mixture to a glass jar with the spatula. Seal well and keep somewhere cool, away from direct sunlight and out of reach of pets.
Estimated Cost: 5 usd
Tools:
- A glass or ceramic bowl (avoid metal)
- A wooden or silicone spatula
- A small glass jar with a lid
- A small measuring spoon
Materials: 2 tablespoons kaolin clay 1 teaspoon fine baking soda 1 teaspoon xylitol 2 tablespoons vegetable glycerin 2-3 teaspoons distilled water 10-15 drops peppermint essential oil
We sometimes think that taking care of the planet or our health requires enormous sacrifices, when really it starts at the bathroom sink. Choosing this toothpaste means one less plastic tube, and ingredients you can name.
It makes me genuinely happy to know that every morning and every night, my smile comes down to clay from the mountains, sweetness from birch and the freshness of mint. It’s a feeling of independence I’d invite you to try.
I never get tired of learning from your experiences. Do you have all the ingredients ready? Are you a little apprehensive about the change in taste? Or are you already an old hand at natural cosmetics with a secret ingredient to recommend?
Please leave a comment below. I’d love to know if you gave the recipe a go, and what the reaction was at home when a glass jar appeared in the bathroom. Sharing these small wins makes it feel like we’re a community heading somewhere healthier and more honest.
Thank you so much for reading, for your time and for your energy. See you at the next natural discovery!
Health note: This recipe is based on natural ingredients, but every person is different and homemade toothpaste is a complement to dental care, not a replacement for it. It contains no fluoride, so if you’re cavity-prone, pregnant, in orthodontic treatment, or making it for a child, talk it through with your dentist first. And keep up your regular checkups — your mouth is the doorway to the rest of your health.